







For a reliable recessed LED deck light, the right question is not “What drill bit size do we use?” The right question is: What complete installation envelope does the fixture require? That envelope includes the visible bezel, body diameter, cutout diameter, recess depth, cable passage, connector clearance, drainage path, and access for replacement.
Many installation guides publish one hole diameter and one depth, but that is rarely enough for a product range. A brand may use different deck materials, board thicknesses, connector systems, and low-voltage architectures across Europe and North America. A professional specification must therefore separate the fixture dimensions from the installation dimensions and make the limits clear to the installer.
Short answer: Specify the finished cutout from the actual fixture drawing, machine the recess to the body depth rather than the face diameter, provide a separate cable passage, keep all connections accessible and sealed, and treat IP rating as a property of the complete installed system—not only the lamp housing.
1. Start with a complete dimensional drawing, not a nominal product name
“Recessed deck light” describes the installation style, not the installation requirement. Two products described with the same words may have very different bodies. One may be a shallow press-fit marker light. Another may be a deeper buried fitting with a sleeve, cable gland, or drainage layer.
Before approving a purchase order or private-label sample, ask the manufacturer for a dimensioned cross-section. The drawing should show at least:
- Outer bezel or face diameter
- Body diameter below the bezel
- Recommended cutout diameter and tolerance
- Total body height and minimum recess depth
- Lead-wire exit location and bend radius
- Connector dimensions and the space needed to make the connection
- Any sleeve, spring clip, retaining ring, or drainage cavity
- Surface materials and thicknesses approved for the installation
VLED’s own product range illustrates why this matters. Its LED deck light range includes compact recessed models with different body heights and suggested cutouts, such as 28 mm, 29 mm, 31 mm, 32 mm, and 39 mm depending on the model. Those dimensions should be treated as model-specific engineering data, not as a universal standard for every deck light.
For a project or wholesale range, the drawing should also identify which dimensions are controlled at production and which are installation recommendations. “Cutout: 31 mm” is useful. “Recommended cutout: 31 mm, fixture body diameter: 30.6 mm, installation tolerance: confirm by substrate and retention method” is much more useful.
2. How to choose the recessed LED deck light cutout size
The cutout should hold the fixture securely while allowing the installer to seat it without forcing the body into the material. The correct value depends on the retention method, the material, and the dimensional variation of the fixture.
Press-fit installations
A press-fit light needs a controlled relationship between the body diameter and the hole. If the opening is oversized, the fixture can rotate, sit below the surface, or require adhesive to compensate. If it is undersized, the installer may damage the bezel, deform the deck board, or pull on the cable while trying to seat the lamp.
Spring clips, sleeves, and retaining hardware
Spring clips and sleeves can tolerate a different cutout strategy, but they still need a defined hole range. A sleeve may become the true installation interface, while the visible face diameter only covers the edge of the opening. The specification should make this distinction obvious to the contractor.
Wood, composite, stone, and metal surfaces
Wood can compress and swell. Composite boards can move with temperature. Stone and porcelain require clean, stable drilling and may need a different tool or mounting detail. Thin sheet metal may need a backing plate. For a product sold into multiple markets, publish the nominal cutout in millimetres and inches, but do not imply that conversion alone defines the correct hole for every substrate.
A useful installation note is to test the hole with a sample fixture before production drilling. Trex, for example, recommends a 1-inch (25 mm) diameter hole for one of its recessed deck-light installations and warns that an enlarged hole can leave the fitting loose. Its instructions also distinguish the recess hole from the smaller cable passage. That is a good model for clear documentation, but the values must not be copied to a different fixture without checking the body drawing.
For OEM and private-label programs, include a go/no-go sample or a simple hole gauge in the approval process. A one-page drawing with a controlled cutout is often more valuable than a longer marketing specification.
3. Recess depth: match the body, protect the surface, preserve serviceability
Recess depth determines whether the light finishes flush, proud, or below the deck surface. It also determines whether the body has enough room for heat dissipation and whether the rear cable can exit without being crushed.
The minimum recess depth should be based on the part of the fixture that enters the deck—not simply on the total product height. A light may have a 45 mm overall height but need a shallower counterbore if the cable exits through a separate channel. A buried model may need the full body depth plus clearance below it.
| Dimension to publish | Why the installer needs it | Common specification mistake |
|---|---|---|
| Face or bezel diameter | Shows the visible finish and minimum edge coverage. | Using it as the cutout size. |
| Body diameter | Controls the drilled opening and fit. | Ignoring clips, sleeves, or cable exits. |
| Minimum recess depth | Prevents a proud or unstable installation. | Publishing overall height only. |
| Cable passage diameter | Allows the lead wire to pass without abrasion or pinching. | Routing the connector through a hole made only for the cable. |
| Below-deck clearance | Provides room for connectors, bend radius, and service access. | Placing the connection directly against a joist. |
Trex’s published recessed-deck example uses a 3/4-inch (19 mm) recess and a separate 1/2-inch (13 mm) cable passage. That detail is important because it separates the visual seating of the lamp from the mechanical path of the wiring. The correct numbers for your product may be different, but the principle is the same: publish both dimensions.
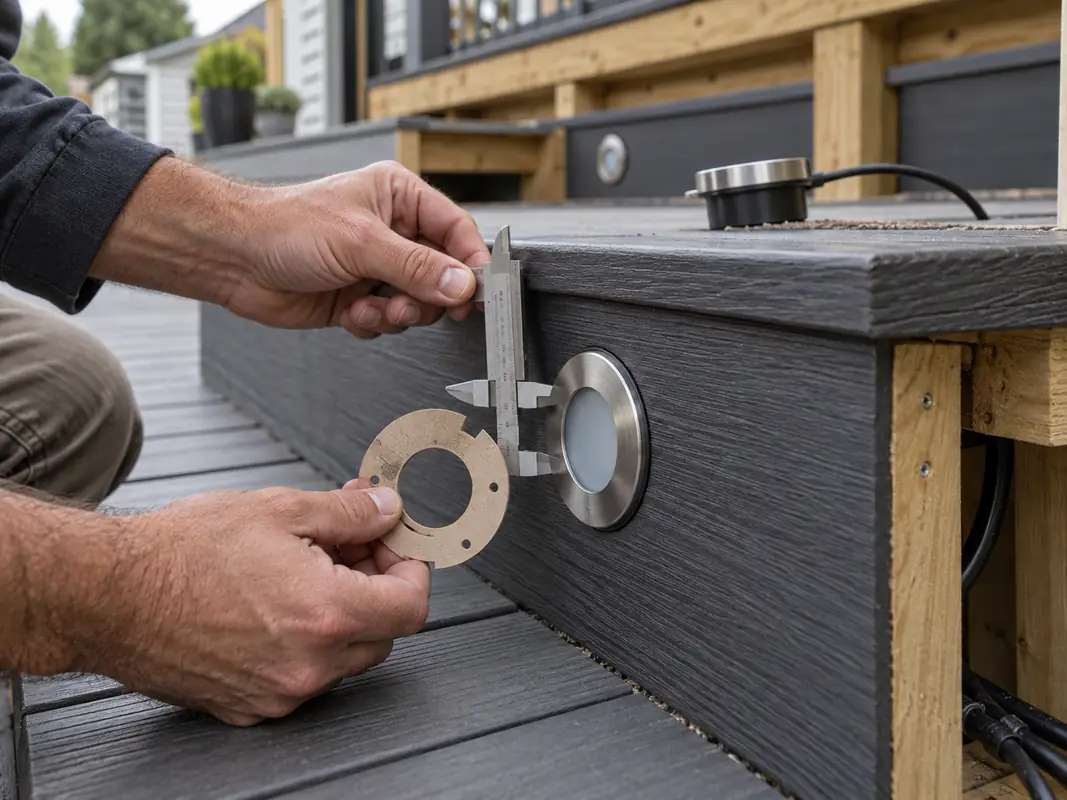
Do not design the recess so tightly that the deck surface traps the fixture during seasonal movement. The light should be seated flush without hammering. For composite decking in particular, follow the board manufacturer’s installation guidance and validate the fit at realistic temperature conditions.
4. Cable routing: plan the route before drilling the visible opening
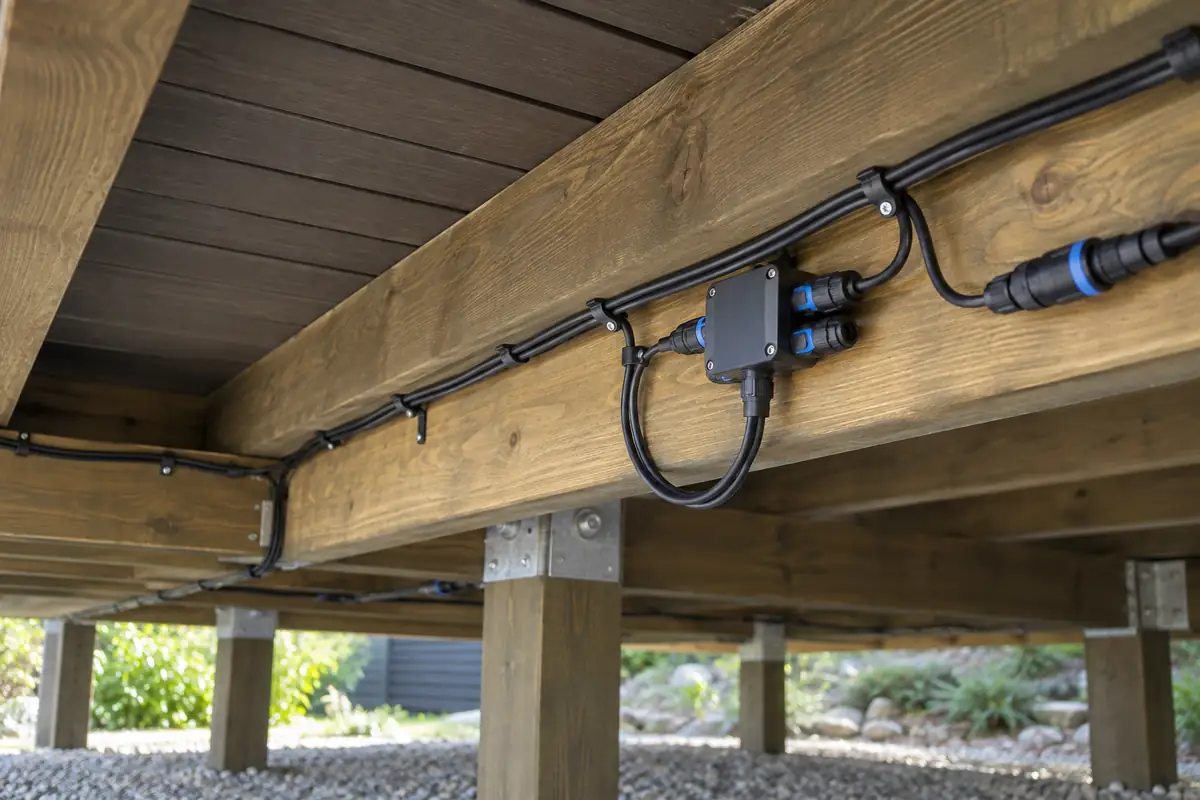
The cable route is where many attractive deck-light installations become difficult to repair. Before marking the face positions, draw the cable path underneath the deck. Identify joists, blocking, waterproof membranes, drainage channels, fasteners, access panels, and the location of splitters or junctions.
For a typical recessed light, use a two-stage route:
- Make the controlled top recess for the fixture body.
- Make a smaller, centered or intentionally offset passage for the lead wire.
- Pull the cable through without using the wire as a lifting handle.
- Leave enough slack to remove the fixture for inspection or replacement.
- Secure the cable so it cannot rub against sharp edges, joists, or moving hardware.
Keep connectors out of the drilled pocket whenever possible. A connector trapped directly below the fixture is hard to inspect, may hold water, and can prevent the lamp from seating flush. Put the connection in a serviceable location under the deck or inside an approved accessible enclosure, depending on the system design and local requirements.
When a deck has a waterproof membrane or a low-clearance substructure, cable planning must happen before the boards are closed. A small removable access panel near the splitter can reduce service time dramatically. This is especially important for hospitality, commercial pergola, and multi-unit residential projects where a maintenance visit is more expensive than the original connection.
VLED supplies related SLED recessed deck light models together with compatible power supply, driver, splitter, extension cable, and hole-saw options. For distributors, specifying the light and the installation accessories as one system makes it easier to control cable length, connector compatibility, and the installer’s bill of materials.
5. Waterproofing is a system detail, not an IP number on the box
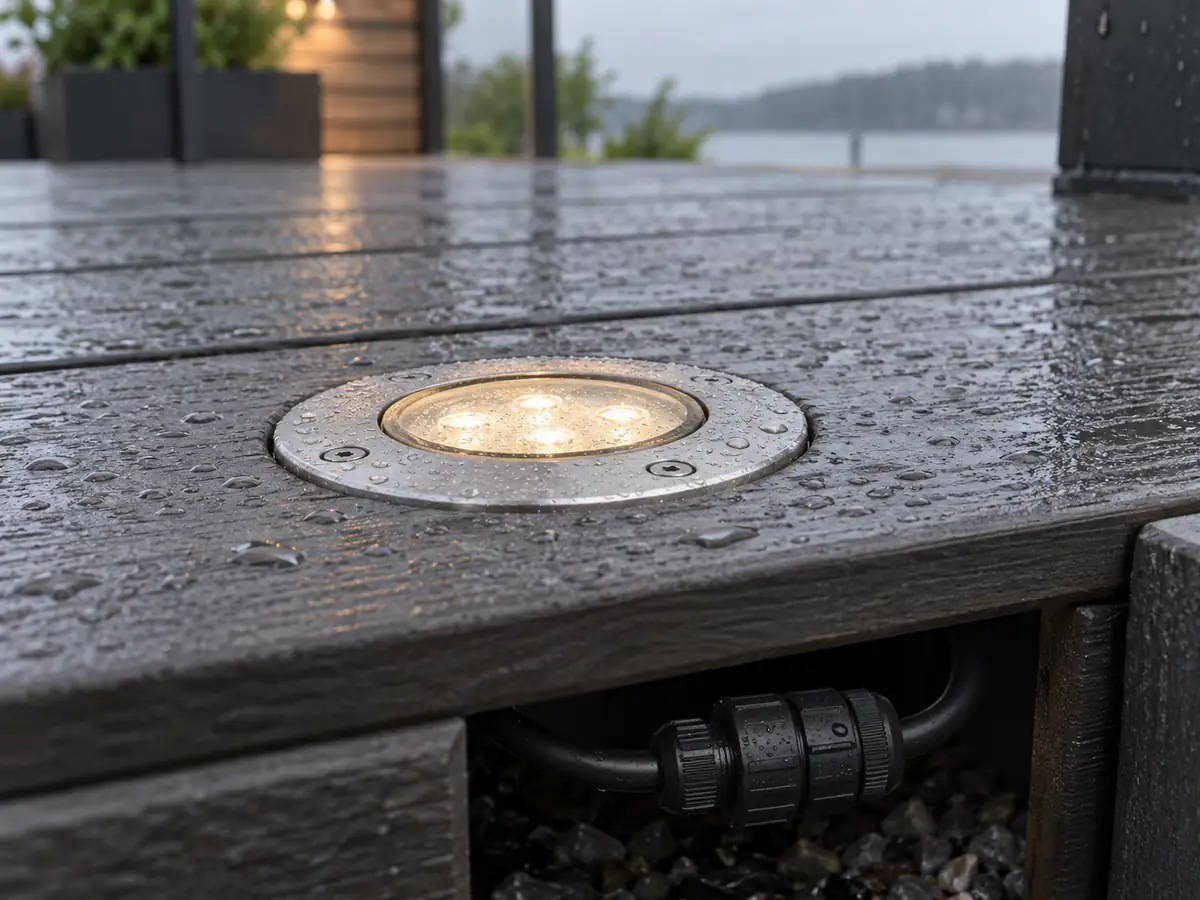
An IP rating describes the degree of protection provided by an enclosure under defined test conditions. The reference standard is IEC 60529. It does not automatically guarantee that an installed deck-light assembly will remain dry if the cable entry, connector, splice, drainage, or mounting surface is poorly handled.
For outdoor deck lighting, check five separate water-management points:
- Front seal: The lens, bezel, gasket, and housing must remain seated after installation.
- Rear cable exit: The cable gland, overmould, or strain relief must match the product construction.
- Connectors: Mating surfaces, O-rings, locking features, and unused ports need protection.
- Splices: Any field connection must use a method intended for the environment and the cable type.
- Drainage: The recess must not become a cup that holds water around the fixture body.
IP65 and IP67 are not interchangeable marketing words. An IP65 claim concerns protection against water jets under the relevant test conditions; IP67 concerns temporary immersion under its defined test conditions. The rating applies to the tested product configuration. Changing the connector, cutting the lead, adding a splice, or sealing the fixture with an unapproved compound can change the performance of the installed system.
For product documentation, state exactly what the rating covers. A stronger specification reads: “IP65 fixture housing with factory-fitted lead; field connections must use the specified waterproof connector or approved junction method.” A weaker specification simply says “waterproof outdoor light,” leaving the contractor to guess what happens below the deck.
6. Connector and splice details that affect long-term reliability
The connection is often the lowest point in the installation and the first place where condensation, capillary action, corrosion, or accidental pulling becomes a problem. Select the connector architecture together with the light, not as an afterthought.
For a pre-terminated system, confirm connector gender, keying, current capacity, cable gauge, sealing method, mating cycle expectations, and whether the connector can be replaced in the field. If a product is intended for OEM branding, lock these details before the label and carton are designed. A connector change late in production can alter the cutout-side cable clearance and the installer’s routing method.
Do not bury an unprotected wire nut, open terminal, or unsealed cut cable under a deck. If field termination is unavoidable, provide an approved enclosure or a documented waterproof splice method. Keep the connection away from standing water and leave enough slack for inspection. Where a connector is exposed to repeated wetting, the cable should enter from a direction that does not create a water trap.
Also specify unused connector protection. A disconnected female connector can collect water even when the light itself is correctly sealed. Caps, plugs, or a compatible sealing method should be included in the kit or clearly listed as required accessories.
7. What professional buyers should request from a manufacturer
A reliable quotation should contain more than wattage, CCT, and IP rating. Ask for an installation pack that lets your engineering, purchasing, and service teams work from the same information.
- Dimensioned product drawing with face, body, cutout, depth, and cable exit
- Recommended hole tolerance for each substrate category
- Installation cross-section showing the cable passage and below-deck clearance
- Connector drawing with dimensions, sealing method, and mating instructions
- Wiring diagram for the intended voltage and dimming or control system
- Guidance for extension cables, splitters, power supplies, and maximum system load
- Waterproofing boundaries: factory-sealed parts versus field-made connections
- Material and finish options for the bezel and visible trim
- Sample approval process for the light, hole gauge, cable, and connector
- Replacement and service procedure that does not require damaging the deck
VLED positions its mini LED spotlight platform around compact recessed formats, low-voltage DC options, dimming, multiple CCT and color configurations, and application-specific product families. For a brand or importer, that creates a useful starting point for a coordinated deck, step, pergola, soffit, and landscape range. The important commercial question is whether the selected model has the right installation interface for the project, not merely whether it produces the desired light output.
8. A practical pre-production and site checklist
Use the following sequence before approving a large order or closing a finished deck surface:
- Confirm the exact model number and revision of the drawing.
- Measure the actual fixture and compare it with the stated cutout.
- Test the hole in the real deck material, not only in a soft sample board.
- Verify the recess depth leaves the face flush without force.
- Check that the cable passage does not interfere with a joist, fastener, or membrane.
- Place connectors where they can be inspected and replaced.
- Confirm the power supply and control system match the voltage and load.
- Seal or cap every unused connection according to the system instructions.
- Photograph the cable route and connection locations before the deck is closed.
- Record the installation details for future service teams and warranty review.
This process may feel slower than drilling from a product photograph, but it is faster than removing finished boards to find a crushed lead or flooded connector. It also gives a distributor a repeatable installation standard that can be passed to contractors in different regions.
Frequently asked questions
What is the standard cutout size for a recessed LED deck light?
There is no universal standard. Compact products commonly use different cutouts depending on body diameter and retention method. VLED’s published deck-light models show several suggested cutouts, including 28 mm, 29 mm, 31 mm, 32 mm, and 39 mm. Always use the exact model drawing and validate the hole in the intended substrate.
Should the cable hole be the same size as the light cutout?
No. The fixture recess and cable passage serve different purposes. A separate smaller passage protects the seating of the lamp and reduces the chance of the fixture dropping through the board. The passage must still be large enough for the lead and any required strain relief, without forcing a connector through an opening designed only for cable.
Is IP65 enough for recessed deck lights?
It can be appropriate for some exposed outdoor applications, but the answer depends on the complete system and installation environment. Check the fixture, cable exit, connector, field splice, drainage, and maintenance detail. IP ratings are based on defined enclosure tests under IEC 60529; they do not validate every field-made connection.
Can silicone fix an oversized deck-light hole?
Some installation guides allow an approved outdoor silicone or adhesive as a correction for a slightly enlarged hole. That should be treated as a documented installation remedy, not as a substitute for a controlled cutout. Excess sealant can obstruct drainage or make future service difficult. For a production project, correct the drilling process instead.
What should a wholesaler include in a recessed deck-light kit?
A practical kit should include the selected fixture, compatible lead and connectors, power or control components as required, installation instructions, dimensional drawing, and a clear method for protecting unused connections. If a project uses multiple light types, include a wiring diagram that distinguishes each voltage, load, and connection path.
Specify the installation before you specify the light
For a deck, pergola, patio, or landscape product range, the most valuable supplier conversation starts with the surface, cutout, depth, cable route, connector system, and service plan. VLED can help brands, importers, and project customers compare recessed deck-light formats and build a coordinated low-voltage specification.
Contact VLED for a project-specific recommendation and share the deck material, available thickness, target cutout, voltage, control method, and expected installation quantity.
Send Us Your Request